
Saturday, January 11, 2014
Classroom Management Tip of the Day
(Cheap) Christmas Gifts for Students
I wanted to give my students something for Christmas that wouldn't cost too much, but also mean something to them. After perusing different sites, I found personalized bookmarks. I decided to make these for my students and put them in a little goodie bag with candy and a "No Homework" pass. I went to JoAnn Fabrics and bought double sided scrapbook paper. It's important that it is double sided so that the back of the bookmark is not plain. I got the ribbon from the dollar section at Target. I then typed up all of their names and printed those out just on white paper. I used fancy scissors to crop the edges. I cut the scrapbook paper to a width of about 2 1/2 inches and a length of six. I then glued on the names and then laminated them. Next, I hole punched the top for the ribbon. Make sure to get very flexible and light ribbon because if it is too thick it will bust the hole. I bent the ribbon in half and looped it through the hole. Ta-da! You have yourself a wonderful gift and it only cost about $7.00 total!


Tuesday, January 7, 2014
Yarn Wrapped Letters
How to make yarn wrapped letters:
.JPG)
So this is what happens when a teacher gets one too many snow days in a row, haha!
.JPG)
I bought these wooden letters from Michael's Craft Store. I recommend buying cardboard letters instead of wooden letters. It was difficult to wrap all of the fancy little edges. It would have been much easier it they were straight edges. Also, I bought four different colors of yarn. You can choose to do all different colors, the same color, or a pattern. I have seen it done several different ways and they all look great! My living room has all four of the colors I chose so that it was match. I decided to spell "home" but I have seen other words like hope, love, and welcome.
.JPG)
I first wrapped vertically to cover the top edges and then wrapped horizontally. The edges were difficult since they curved so I had to get out the hot glue gun for those. This is a time consuming and tedious project! Warning: patience is needed!
.JPG)
To do the "O", I first wrapped vertically and then horizontally around the hook. I kept wrapping it all the way around until it was finished. Make sure to pull the yarn really tight to keep it in place. I followed the same pattern (horizontally then vertically) with the other letters.
.JPG)
Here is the finished product!
Monday, January 6, 2014
DIY Burlap Wreaths
.JPG)
.JPG)
I have been seeing these all over and decided that it's time to make my own!
.JPG)
I got a few of these flowers to hot glue onto the finished product. I got three cream colored flowers and one that looks a little more rustic to add some contrast. I also got a circular outline and a role of burlap.

I wrapped the burlap around the tube two times to make it look slightly thicker. Then with the extra burlap, I tied a bow. I hot-glued the ends to the tube and then the bow to the burlap. To make the final product, I hot-glued the four flowers to the wreath.
.JPG)
Here is the final product on the door!
I loved making the first wreath so much that I needed to make a second! I made the first one to use during winter so I decided to make one that I can use in the spring.
.JPG)
Here are the materials that I purchased from JoAnn's: 1 1/2 yards of coral burlap, a white flower, and a wire wreath template.
.JPG)
It was hard to get started at first because I bought yards of burlap instead of the packaged rolls. They didn't have anything "springy" enough for me in the rolls. After I tediously cut and got rid of all of the annoying fringe coming of the sides I then had several strips like I would have had had I bought the roll. I recommend buying the roll; it will save you a lot of time! I just made loops and tucked and tucked some more! The posts I have seen about making them said that there is no right way to do it and they are right! It was very easy once I got going!
.JPG)
Once I got all of the burlap looped and tucked away, I hot-glued a large white flower onto the side.
.JPG)
Here is the finished product on the door! Doing it myself was fun and much cheaper than buying it already done!
Sunday, January 5, 2014
Peek into my Closet- January


Top: Target
Plum Jeans: Kohl's
Boots: Target
.JPG)
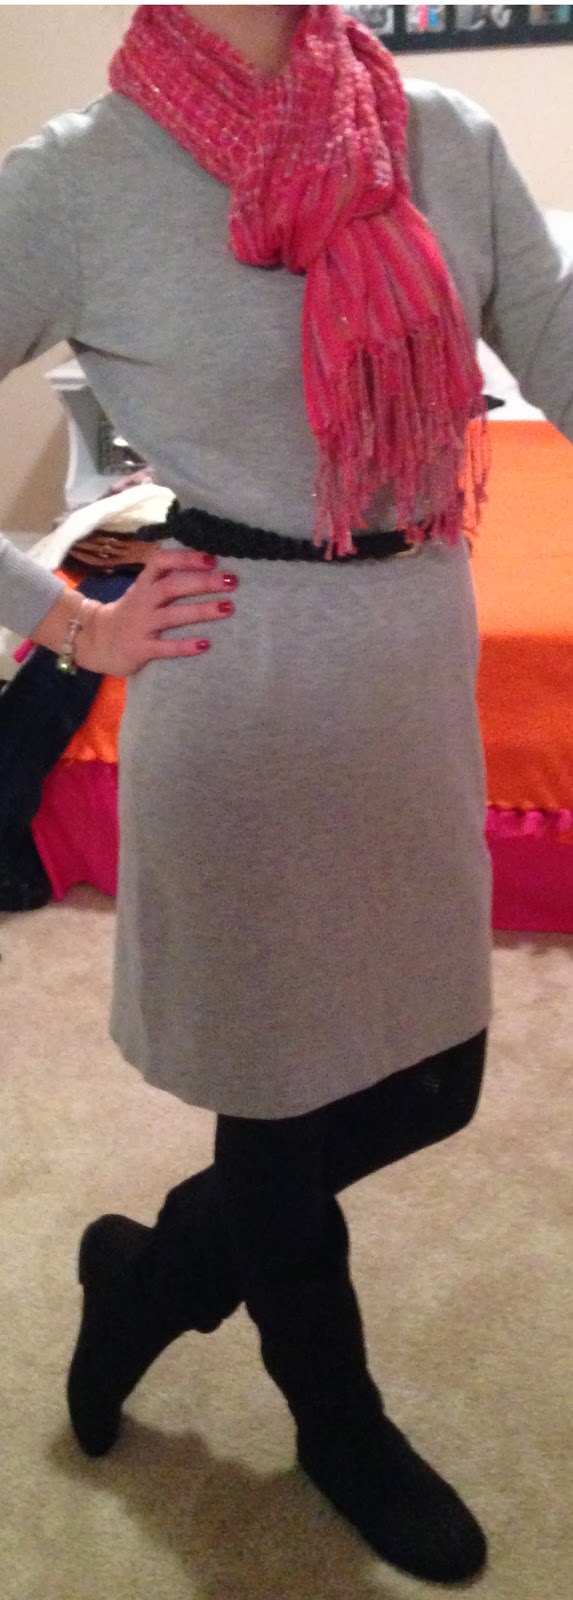
Dress: Old Navy
Scarf: Kohl's
Boots: Target

Top: Old Navy
Jeans: JCP
Leg Warmers: Payless
Scarf: Kohl's
Boots: Target

Top: JCP
Scarf: Kohl's
Teal Jeans: H&M
Boots: Target

Necklace: Forever 21
Top: Express
Boots: Target
Black Jeggings: Kohl's

Scarf: Kohl's
Top: Old Navy
Jeans: JCP
Leg Warmers: Payless
Boots: Target
Dress: Old Navy
Scarf: Kohl's
Belt: H&M
Leggings: Kohl's
Boots: Target
Thursday, January 2, 2014
New Year's Memory Book
I created a New Year's Memory and Resolution book with my boyfriend this year so that each year we can look back at our greatest accomplishments and goals. I have seen so many different versions of these made for kids on Pinterest and wanted to make one that works for a couple. I made several copies of the same page so that each year we can just fill in the year and begin with our recap. This will provide us with some great trips down memory lane!


Mint.com
Mint.com Best Budget System Ever!
New year means new budget! This app is free and is also a website if you do not have a smart phone. Mint.com can help you create a budget, choose your amount, link all accounts and view your spending in multiple different charts to help you understand your finances. I have the app on my phone so I can quickly check how I am doing financially.

Classroom Organization
I wanted to share a few of my favorite classroom organization tricks! I learned fast that organization is key when trying to be a great teacher. I wanted to spend the least amount of money possible to create a fully functional and organized classroom. Here are a few of my tricks:

I make anchor charts on the daily and try to make them look colorful and appealing. I got this little bucket from the Target dollar section (one of my favorite places to find cheap classroom items). It holds all of my markers and can be stuck on a command hook on my white board when I need to use them on chart paper.

Instead of buying a planning book that did not match my schedule, I decided to make my own. With some help from a co-worker, we developed a weekly lesson plan template that fit our exact needs! I copied enough for the entire year and keep it in my Teacher Binder.

This is one way that I have found to work when trying to organize the three different subjects that I teach. I have a magazine holder for each subject (also found at the Target dollar section). Starting on the far left, I keep my teacher manuals, then Science, Math, and Language Arts. I keep all the books I will read, tests, quizzes, and worksheets for the subject all together. I usually copy for a week at a time or per unit.

The "I Can" Statements have become a must-have in Common Core classrooms. Since my classroom is owl themed, my header reads: "Whooooo Can? I Can...". Then I have a child friendly "I Can" statement for each subject I teach. Sometimes I have to change them daily, sometimes weekly, and sometimes per unit.
 \
\
I needed a way to organize our laptops and keep the cords from getting all tangled together. I purchased a dish rack and they fit perfectly! It holds all of them and the cords stay separated through the side slots.

I needed a way to organize and store all of the students back to school forms, medial information, and notes I receive from parents. I use a crate and file folder for each student. I labeled them by number so I don't have to redo each tab each year. I can easily grab out parent information or file student inventories.

I despise students sharpening their pencils in the middle of a lesson so I had to come up with something so that students could quickly grab a sharp pencil. I found these labels on Pinterest and used modge podge on the inside of each drawer. When a student needs a new pencil, they place their pencil in the pencil hospital and can take a sharp pencil. I have a student at the end of each day sharpen all of the pencils in the pencil hospital. I notice that the pencils that they come with at the beginning of the year last much longer this way and they don't end up having one inch long pencils.

I use binder clips with a small label to label my shelves (Monday-Friday) . I use this tray to organize the materials that I will need each day of the week.

Once again, I use binder clips to label (notices, copy, file, morning work).

Since my students need to master their multiplication facts, I have monthly centers for them to do whenever we have extra time in math. I got the white shelves from Target and the blue tubs from the Dollar Tree. I found free multiplication games on TPT and Pinterest to use and rotate them out each month. This has really helped the students memorize their facts in a fun way.

With our math series, we have so many manipulatives that the students need on a daily basis. It takes so much time to pass them out at the beginning of each lesson so I put together a "math tool box" that has each manipulative and enough for each table. I got the green baskets from the Dollar Tree and have one for each table. At the beginning of math, the student in charge of the table gets the basket and puts it on their desk to use.
In order to create a community atmosphere where my students are responsible for their actions, I guided the students as they created their own class rules. They each signed it and we hang it in our classroom. They take pride in their rules and enjoyed having created them.
Elf on the Shelf
This year I made a new little friend named Snowflake. This was one of the most fun and magical things that I have done in my classroom so far. I first read the book to the students explaining all of the "stipulations" of having an elf in our classroom (no touching being the main rule). We also had to think of a name for our elf. Each student wrote a name on our white board and then we took a vote. It came down to Snowflake and Billy Bob Joe (they were very creative). Then, I told the students that he should be coming any day! They were so excited walking into school each morning looking for where Snowflake had moved to!


 Peeking through the Math Enrichment tub.


Snowflake climbed onto the document camera.

Snowflake hanging from the flagpole.

Snowflake hanging on the white board. I noticed that the day went much smoother if the he was up high and the students weren't tempted to touch him.

Spying on the kiddos in their favorite place- the ticket jar!

Snowflake playing computer games.

Snowflake reading a Christmas book in the book nook.

Snowflake hanging out on the book rack.

Playing Uno with the owl with mini cards.

Snowflake hanging from our "blue lantern".

Snowflake getting into our indoor recess games.


Setting a good example of following the rules.

After a long few weeks, Snowflake was taking it easy on the tissue box.
Subscribe to:
Posts (Atom)